BELOW are the original words of the tutorial's creator. I apologize if they are stream of consciousness. I'm not editing it.
DISCLAIMER: i just snapped quick pictures while i was coming up with the idea this morning so if i didn't explain something well please lmk and i can take more pictures next time around (I have at least 5 more to make)
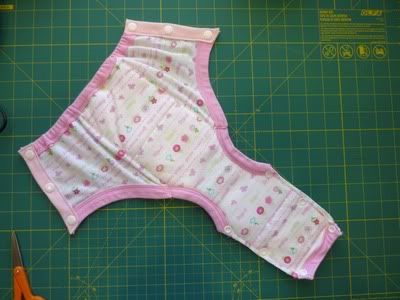
dd suddenly decided she wanted to start using the potty, but i don't have any trainers (or the time to make a bunch from scratch right now) so i grabbed some 2T trainers from target and came up with an idea. i pre-washed them on hot a couple times to shrink them down (they were ginormous on dd straight out of the package) and then got to work...
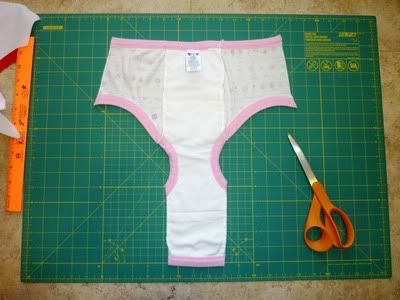
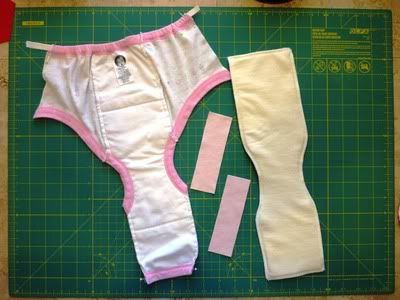
first i cut the front of the trainer right next to the serged soaker edge so that the center soaker was left intact and the side panels were left with a raw edge.
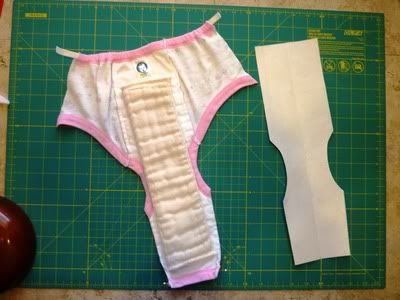
i think a preemie prefold would work great as an added soaker, but i only have one so i had to make my own soaker. make a pattern for the soaker by measuring the front edge of the soaker on the trainer (i got 3.75") and then the back (i got 4.25"), the total length (i didn't measure, just laid it out), connect the dots to make the general shape & size. then lay the trainer on top of your pattern and mark the leg openings (this part is fiddly and you'll have to kind of just make it up as you go...just trim out a little at a time until it looks like it will fit inside the undies). cut and serge (or zigzag) your soaker layers together.
also, cut some small pieces of knit fabric to reinforce the side panel edges where the snaps will go (the front panel won't need this because you can go right through the soaker pad). i cut mine 1.5"x5" so that they would fold over the raw edge of the trainer, but you could do a single layer if you wanted i think. be sure to use a knit so the edges don't fray, or you can fold the edges under, but i didn't want to have to do any extra work also, the waistband has elastic so you need to be sure to pull that out so you can stitch it down (if the waist is too big for your LO you can modify the size here by taking out more elastic)
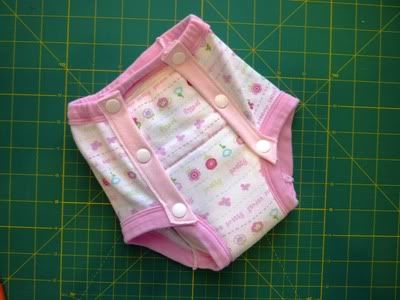
next just straight stitch and sew down the soaker pad and the snap reinforcement pieces to the tabs
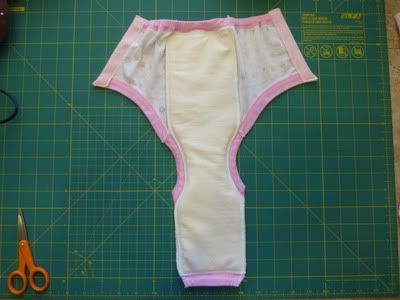
then add your snaps to the front panel (i just eyeballed it and put one on the leg and waistband - be sure not to go through the elastic on the waist) and then put on smack in the middle. then for the sides you can just line them up over the snaps you just did to figure the correct placement.